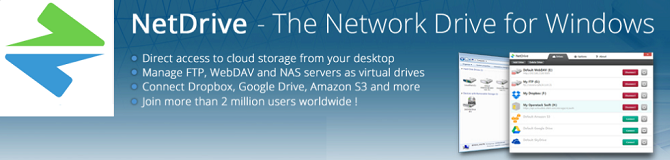
如果你的工作是常常需要管理FTP站上傳或下載檔案,卻一直覺得常用的FTP傳輸軟體不是很方便好用的話,NetDrive正是你需要的!NetDrive 能將遠端FTP 儲存空間映射到本地,將FTP空間虛擬成本地硬碟,讓你使用FTP空間和使用本地硬碟一樣,可以直接將檔案文件拖放到FTP空間中,然後像操作硬碟中的檔案一樣,進行複製、移動、粘貼、解壓縮、播放影音檔、運行可執行程式等動作。NetDrive更支援了FTP SSL加密、代理伺服器等設定功能,而且還能搭配同步軟體,讓電腦中的資料夾直接跟FTP站台同步。
NetDrive 主要功能
- 將遠端的FTP儲存空間映射到本地電腦中
- 可從FTP空間中直接執行檔案、檢視文件或音樂、影片或者圖片檔, 無需預先下載到電腦中,可以更簡單方便地欣賞多媒體檔案
- 可以滑鼠點選、拖、拉的方式下載或上傳檔案,讓你在 Windows 的檔案總管就可以進行操作
- 可在電腦開機時自動執行、登入FTP空間並虛擬成本地硬碟
- 把FTP變成"我的電腦"中的一個磁碟區
- 可在Windows檔案總管中拖拉檔案
- 可執行的資料有影片、音訊等其他文件
- Windows啟動程式時自動執行
- 為Enterprise OEM license提供SDK(Software Development Kit)功能
Site Manager
- You can use NetDrive Site Manager to easily register and connect to all remote servers you wish to access.
- Simply map your drive to a specific site and it will be configured automatically the next time your Windows starts. You can add as many sites as you want.
Using Windows Explorer
- When you connect to a remote server, a drive letter will be mapped and you can transfer files and folders by drag and drop in Windows Explorer.You can manage files and folders with a click of mouse.
 NetDrive supports direct file operation in mapped drive.You can run any .exe files in remote server from your Windows explorer.To watch a movie file in your remote server, you just need to double click it.
System Tray Menu
- Once you install NetDrive, you will see an icon created in your system tray.(Right click your mouse on the icon to view menu) NetDrive tray icon provides shortcuts to use NetDrive. You can open the site manager, configure NetDrive, connect to registered site or view logs
Configuration
 You can customize the program settings from Setup menu.
From Setup menu, you can manage action after connection, auto-connection to specific site when Windows starts and log monitoring.
DOS/Legacy support
 Since NetDrive provides Windows system driver to mount drive, you can use DOS-prompt to use commands like copy, xcopy and dir.
Other DOS-based legacy applications can be used since NetDrive provides DOS based file access.
Windows
· Windows 10
· Windows 8
· Windows 8.1
· Windows 7
· Windows Vista
· Windows Server 2008/2012/2016
Windows 10 users : You may need to reinstall NetDrive when you are upgrading from previous versions of Windows.
macOS
· macOS 10.10 Yosemite (support up to NetDrive 3.8)
· macOS 10.11 El Capitan
· macOS 10.12 Sierra
· macOS 10.13 High Sierra
· macOS 10.14 Mojave
· macOS 10.15 Catalina (from NetDrive 3.8)
· macOS 11 Big Sur
· macOS 12 Monterey
· macOS 13 Ventura
 CloudSync
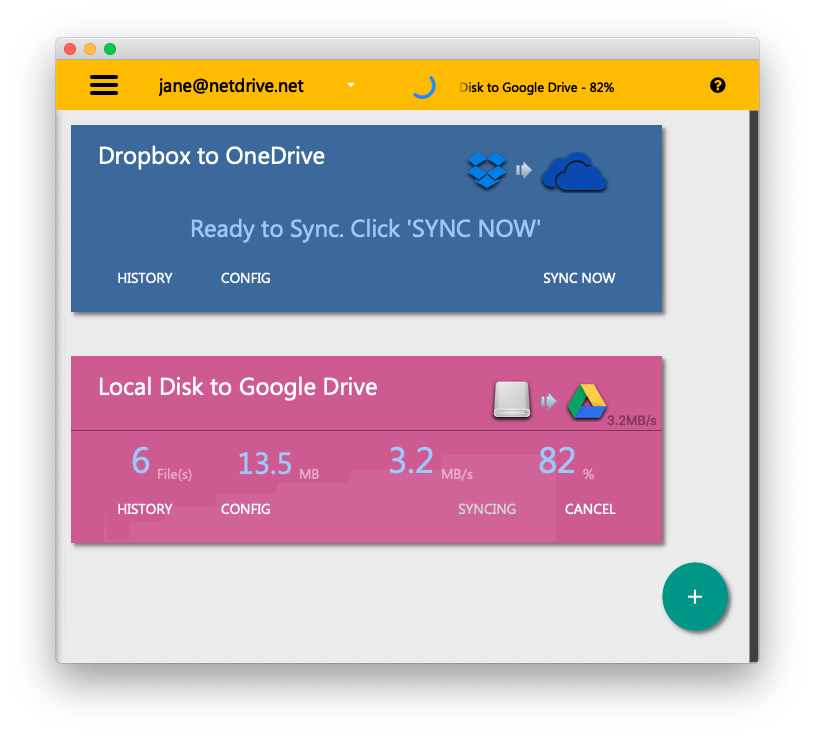
CloudSync enables you to sync between your storages. You do not have to manually download and upload files between storages. CloudSync will download and upload files automatically and transfer result will be reported. (File transfer happens on your PC/Mac)
Stress-free Sync
Stress-free sync between Cloud Storages. You do not have to manually download and upload files between storages. CloudSync will download and upload files automatically and transfer result will be reported. (File transfer happens on your PC/Mac)
Fast Sync
Unlike drive-mount applications, CloudSync access files with minimum API use. Faster than every drive-mount applications.
Complete Sync
Don't worry about missing files. Sync everything bit-by-bit.
Supports All Major Cloud Services
You can sync files between Google Drive, Dropbox, OneDrive, OneDrive for Business, Google Cloud Storage, Amazon S3, ownCloud, Swift, Hubic, FTP and WebDAV.
Steps to Sync
1. Select Source
Select where do you want to sync from and click Connect button. You can select one of supported cloud services or local hard disk.
You need to authorize CloudSync to access your files. When your folders are displayed select source folder or create new folder.
2. Select Destination
Select where do you want to sync to and click Connect button.
You need to authorize CloudSync to access your files. When your folders are displayed select destination folder or create new target folder.
3. Sync!
You can manually start your sync or set it to run automatically when changes detected.
You can also schedule your sync.