最新版 Lenscare OpenFX v1.5
最新版 Lenscare AfterEffects 1.5.4
最新版 Lenscare Photoshop v1.47

Lenscare 將景深和焦點生成移至後期製作。如果你需要高質量的相機模糊和2d後處理的靈活性,Lenscare是一個很好的選擇。它可以讓你擺脫長時間的額外3D渲染時間。開發這些過濾器的關鍵方面是盡可能地匹配真實的東西。 Lenscare可用作Adobe After Effects和Photoshop兼容程式的插件。
.jpg)
Depth of Field
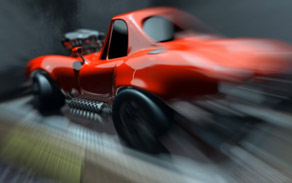
Depth of field effects (dof) happen in all real optical devices to a certain extent. It is heavily used in photography and film as a style element. In computer graphics dof is usually generated using ray tracing techniques which increase rendering times considerably. The depth of field plugin generates those fast as a post process. It needs a depth buffer for its calculations.
Out of Focus
'Out of Focus' is a fast version that works without depth information. It creates a blur with constant radius over the complete image and is a good complement to 'Depth of Field'. It offers some extra functionality as well. It's possible to use a custom drawn lens in addition to the generateable ones. 'Out of Focus' also offers background distortion for semi transparent areas.A cameras blur looks substantially different from what common blur filters look like. Among other differences Lenscare offers these features to help adding realism:
Lens Aperture
A cameras lens aperture greatly defines the look of its blur (Bokeh). Therefore the filters offer the possibility to alter the lens apertures form to simulate several kinds of real cameras. This is important if you want to comp cg elements into real footage or just want your cg shot to fit in with the rest. A wide range of apertures can be simulated. The Out of Focus plugin provides the possibility to completely replace the aperture with a custom image. The aperture's form is most apparent in highlight spots.
Highlights
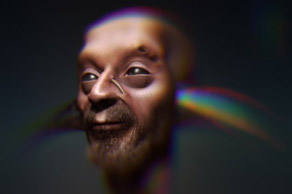
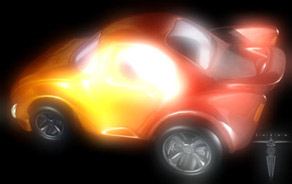
In reality very bright image parts are predominant when being out off focus (see image below). Unfortunately common graphic formats cut of bright parts. Thus the plugins offer the possibility to select parts that are supposed to be brighter and give those boost.
Background Distortion
This is only available in 'Out of Focus'. When looking through a blurred object the background is distorted due to that object. This effect is not very apparent. But slight distortions help adding to the believability of your comp. To experience this effect try holding your finger in front of your eye so that it is out of focus. Now look through the blurred region on whatever is behind. Move your finger around slightly to see the effect better.
Apart from its speed and quality, an important advantage of a depth of field post filter is that you are able to test various focus settings easily without re-rendering the whole scene. That way you can quickly get an impression what settings work out best for your shots.
Speed
'Out of Focus' effects is a speedy 2d blur and can compete with any existing solution. 'Depth of Field' is very fast for what it does. In a lot of situations you can save hours of render time for just a couple of seconds per frame in post processing. This is a big advantage especially with high quality global illuminated renders. Imagine what you can save on animations. Check out this comparison of Brazils depth of field with Lenscares. (Brazil: 190 minutes vs. Lenscares dof: 6 seconds + 4min no dof Brazil render). Of course Lenscare takes advantage of multiple cpus if present.
Quality
Plenty depth of field and out of focus solutions are available. Fortunately for us most don't simulate camera effects properly. They don't do their names justice because their algorithms are not physically based. They are just methods that look nice in some situations but fail in others. A common mistake for 'depth of field' filters is to 'blur' all the surrounding pixels without regards to their depth values. Usually this results in ugly glow effects in regions with great differences in depth. Here is a comparison of the After Effects standard depth of Field filter compared to Lenscares. The artifacts described above can be seen pretty good in the After Effects version. Please note that the After Effects version was honestly adjusted to look as good as possible. Stochastic or super sampled ray traced blurs suffer from artifacts if not enough samples are used. Lenscare doesn't produce any such artifacts. Of course both filters support 16bit image format. Judge the quality for yourself and take a look at the gallery or download the demo version.
Issues
There are common unavoidable problems that all post processing depth of field solutions have. It's not possible to blur reflections or objects behind transparent objects correctly. This is obvious when you see that the depth buffer can only hold one value per pixel. But the biggest problem is with no doubt the missing information. 'Depth of Field' tries to compensate for missing information but of course there are situations when this is not enough. An example to illustrate the problem is a fence in front of the camera that is so much out of focus that it's hardly noticeable in the resulting image. Now the plugin would have to make up what's behind that fence completely. Obviously this is not possible. In such situations it is recommended to render in layers and apply several blurs.
Lenscare OpenFX
(compatibility: Nuke, Digital Fusion,Toxik/Maya Composite, other untested)
Lenscare AfterEffects
(compatibility: After Effects, Premiere, Combustion(no float), Digital Fusion (no float), other untested)
Lenscare Photoshop
(compatibility: Photoshop, other untested)
Flair OpenFX
(compatibility: Nuke, Digital Fusion,Toxik/Maya Composite, other untested)
Flair AfterEffects
(compatibility: After Effects, Premiere, Combustion(no float), Digital Fusion (no float), other untested)
Flair Photoshop
(compatibility: Photoshop, other untested)
Fresh Curves AfterEffects
(compatibility: After Effects, Premiere, other untested)
Lensfeed AfterEffects
(compatibility: After Effects)
ZbornToy AfterEffects
(compatibility: After Effects, Premiere, Combustion(no float), Digital Fusion (no float), other untested)
Flair
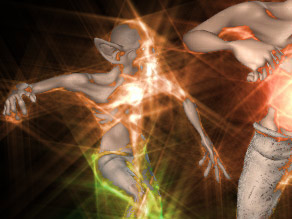
Flair brings 8 high quality effects to Adobe After Effects and Photoshop compatible programs. Among them shine, glow and sparkle effects. Of course with 16bit and multi CPU support.
|
Amiga Rulez |
|
|
Box Blur |
|
|
Glass Sphere |
|
|
Mosaic Plane |
|
|
Glow |
|
|
|
|
|
Radial Blur |
|
|
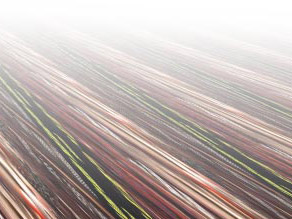
Volumetrics There are various parameters to adjust the effect to your needs. Including color adjustment, gamma correction, ray length, radius and several blend modes. Not only compared to the traditional method of generating Volumetric light using a raytracer our solution is blazing fast. |
Fresh Curves
Curves are a very versatile and precise color correction tool. The native After Effects version lacks control and accuracy to take full advantage of it. Fresh Curves makes up for these drawbacks so you can get the most out of this basic tool.
| More control | More accuracy | ||
 |
More channels Fresh Curves has brightness, saturation and hue channels for more direct control on top of the usual RGBA. |
 |
Histogramm The integrated histograms helps you find and modify desired areas and gives feedback to your changes. |
 |
Relative Curves Now it's possible to adjust on attributes based on another. Relative Curves also has a built-in preblur and a postblur curve. |
 |
Interface Tired of that old, tiny interface? Here is a big, nice resizeable one. |
 |
Bezier cubic splines with tangent handles for more curve control. Interpolation modes similar to the ones in the AE graph editor round things off. |
 |
Zoom tools will come in handy for those out of range float colors or when fiddeling with details. |
 |
Invert Curves Using invert you can work in your own color space. Apply your custom "gamma curve", do the work and apply and the inverted one. |
 |
Edit and sample Need to be precise? Just edit or sample your values. And change the color range to what you are comfortable with. |
Lensfeed
What it does
Lensfeed shows a camera's live preview inside After Effects. No still frames but a moving live feed! Lensfeed is implemented as regular After Effects filters so the livefeed is displayed inside compositions and can can be treated like regular footage.
What it is good for
This tool comes in handy to optimize shots for compositions. Especially to adjust green- or bluescreen scenes to existing footage. Using Lensfeed you can match perspective and lighting to achieve beliefable setups. And since all the effects can be applied to the live footage it's possible to optimize it for the keying tools used. This helps creating higher quality footage and in reducing the work on the actual composition later.
How it works
After Effects was not made with moving live footage in mind. So implementing it was a bit tricky. Lensfeed consists of effect plugins that render the current image from the camera to the composition and a general After Effects plugin that makes it animate. This second plugin unfortunately only works in After Effects. So in other hosts there will only be single non animated frames. Possibly there will be solutions for those in the future.
ZbornToy
ZbornToy - the after effects plugin
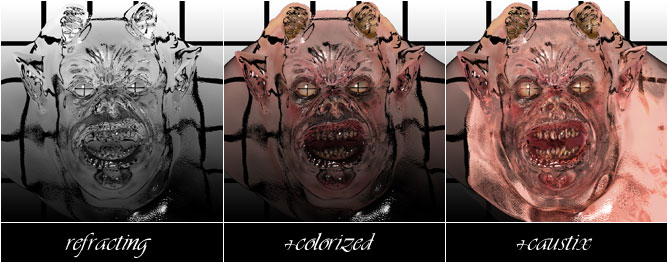
Our debut product is made to lead a line of tools that introduce a new meaning to depth in compositing. The ZbornToy has the ability to extract a maximum of information out of simple depth images and allows you to not only light and texture them, but to refract backgrounds, cast caustic reflection back onto the background and a whole lot more.

The design of ZbornToy has the amount of parameters reduced to a minimum, while still providing a vast amount of control over every aspect of it. The goal has been to achieve the performance and feel of a full blown render engine when it comes to the results. Yet it is ment to be not only easily accessible, but fast and fluent so that it is fun and even playful to use.
